Zero to Production: Deploying Next.js to AWS EC2 using Docker and GitHub Actions (Self-Hosted)
Deploying a modern Next.js app can feel overwhelming with all the choices available. In this guide, we’ll skip the "magic" of Vercel and build our own robust CI/CD pipeline using Docker, GitHub Container Registry (GHCR), and a Self-Hosted Runner on AWS EC2.
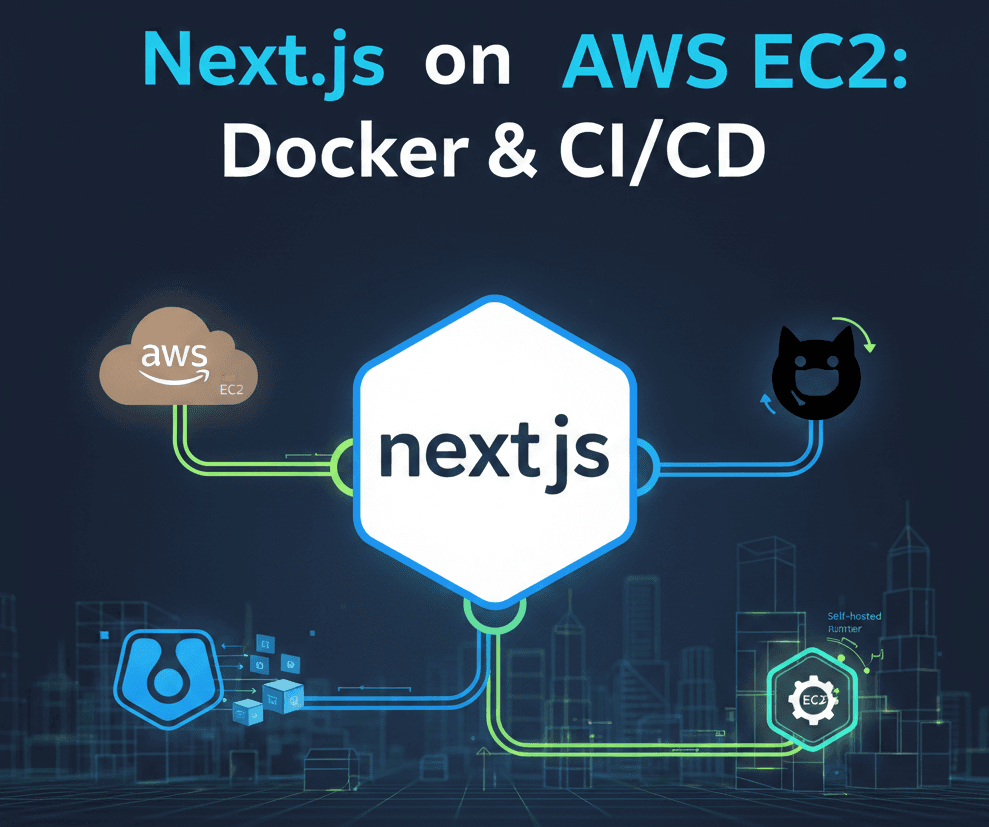
The Architecture
1. Prepare Next.js for Docker
To keep our Docker image tiny, we must enable Standalone Mode.
In your next.config.ts (or .mjs):
const nextConfig = {
  output: 'standalone',
};
2. The Dockerfile
We use a multi-stage build to ensure our production image is lightweight (~150MB).
FROM node:22-alpine AS deps
RUN apk add --no-cache libc6-compat
WORKDIR /app
COPY package*.json ./
RUN npm ci

FROM node:22-alpine AS builder
WORKDIR /app
COPY --from=deps /app/node_modules ./node_modules
COPY . .
RUN npm run build

FROM node:22-alpine AS runner
WORKDIR /app
ENV NODE_ENV=production
RUN addgroup --system --gid 1001 nodejs
RUN adduser --system --uid 1001 nextjs
COPY --from=builder /app/public ./public
COPY --from=builder --chown=nextjs:nodejs /app/.next/standalone ./
COPY --from=builder --chown=nextjs:nodejs /app/.next/static ./.next/static
USER nextjs
EXPOSE 3000
ENV PORT=3000
CMD ["node", "server.js"]
3. Setting up the EC2 Runner
On your Amazon Linux 2023 instance, install Docker and the GitHub Runner.
Fixing Dependencies:
Amazon Linux 2023 is minimal. You'll need libicu for the runner to work:
sudo dnf install -y libicu perl-Digest-SHA
Install Docker:
sudo dnf install -y docker
sudo systemctl enable --now docker
sudo usermod -aG docker ec2-user
Note: Log out and back in for group changes to take effect.
4. The GitHub Actions Workflow
The "Gotcha": Docker requires lowercase image names. We'll handle that in our script using tr.
Create .github/workflows/deploy.yml:
name: Build and Deploy
on:
  push:
    branches: [ "main" ]

env:
  REGISTRY: ghcr.io
  IMAGE_NAME: ${{ github.repository }}

jobs:
  build:
    runs-on: ubuntu-latest
    permissions:
      contents: read
      packages: write
    steps:
      - uses: actions/checkout@v4
      - name: Log into GHCR
        uses: docker/login-action@v3
        with:
          registry: ${{ env.REGISTRY }}
          username: ${{ github.actor }}
          password: ${{ secrets.GITHUB_TOKEN }}
      - name: Build and push
        uses: docker/build-push-action@v5
        with:
          context: .
          push: true
          tags: ${{ env.REGISTRY }}/${{ env.IMAGE_NAME }}:latest

  deploy:
    needs: build
    runs-on: self-hosted
    steps:
      - name: Pull and Restart
        run: |
          # Lowercase the image name for Docker
          IMAGE_ID=$(echo ${{ env.REGISTRY }}/${{ env.IMAGE_NAME }} | tr '[:upper:]' '[:lower:]')

          docker pull $IMAGE_ID:latest
          docker stop nextjs-app || true
          docker rm nextjs-app || true
          docker run -d --name nextjs-app -p 80:3000 $IMAGE_ID:latest
Troubleshooting Common Errors
- "Permission Denied" on Docker socket: Ensure your runner user is in the
dockergroup and you've restarted the runner service (sudo ./svc.sh restart). - Invalid reference format: Always remember to lowercase your
${{ github.repository }}string before passing it to Docker. - Missing standalone folder: Ensure
output: 'standalone'is in your Next config.
Conclusion
You now have a fully automated pipeline! Every time you push to main, GitHub builds your image, stores it in GHCR, and your EC2 instance pulls and deploys it instantly.